Is anyone else feeling some anxiety over the upcoming move to requiring MFA for Salesforce logins? I was! So thought I’d finally see just how bad it is – and it’s not bad!
This video from Salesforce covers it, and below I discuss what I did.
– covers it, but thought I’d also discuss what I did.
Step 1
I created a Permission set (setup/permission set/new, save; then search for multifactor) and checked the “Multi-Factor Authentication for User Interface Logins” box.

Step 2
The next step is to add your test user to the permission set; I’m picking on Charlotte… um, I chose Charlotte. (Recommendation: don’t surprise your users, let them know this is coming.)

Step 3
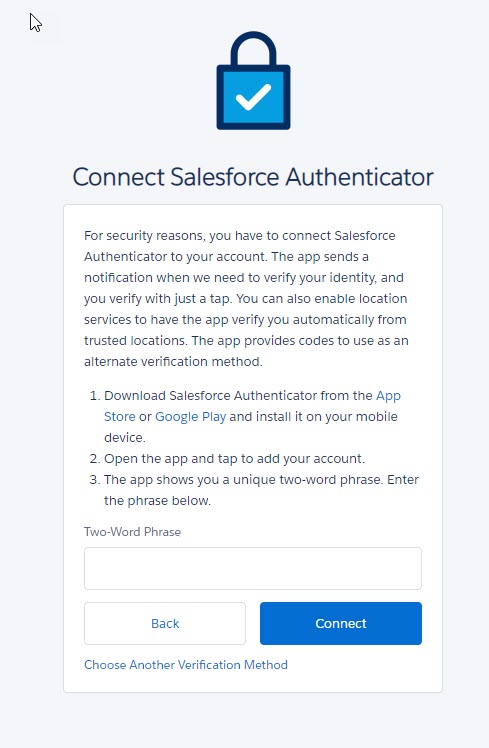
When Charlotte logs in, she will get this screen. She can download Salesforce Authenticator from the Google Playstore or Apple App store. Note: there are other ways to authenticate; if you are using SSO, you can also set it up in your SSO tool. For this blog, we’re using Salesforce Authenticator.

Step 4
Once Charlotte has installed the Salesforce Authenticator app, she can launch it and select “Add an Account”. I can’t do a screen print of it – guess it’s a security thing. But basically, when Charlotte clicks “Add an Account”, she will get a two-word phrase that she can enter into the screen shown above; she can then click Connect on the screen above and Connect on the authenticator app, and she’ll be done. For those of you with multiple Salesforce accounts, you can use the same app for all of the accounts (I have two on my app currently and will be adding more).
Step 5
Have Charlotte log out and log back in again; this time, she just has to click Approve on the mobile device. She can also select “Always approve from this location” so that next time, she doesn’t even have to do that.
Summary
It’s a lot easier to set up MFA than I thought. Here’s the FAQ for MFA if you want to browse it – it has a lot of good information.
Need help?
If you need assistance with this, contact your RightStar Sales rep or fill out the contact form on this page.
