Do you regularly download the same Jira filters to Excel to create pivot tables and reports? If you do, you need to know how to use Excel’s built-in ability to retrieve CSV data directly from the Web and how to use it to make updating these reports simple and fast.
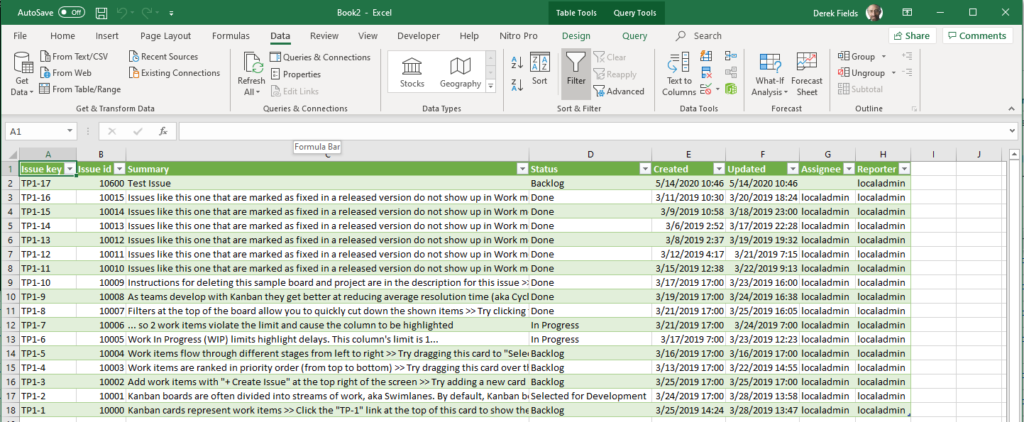
As an example, I created a new project using the sample data from the Jira template. I then created a filter to return all of the issues for this new project. Finally, I created an Excel spreadsheet to retrieve these rows. The final result looks like this:
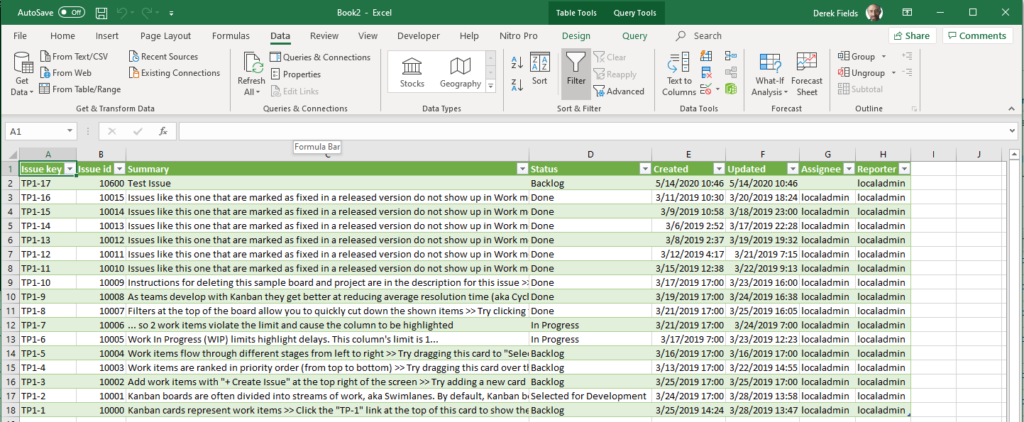
I can now update this spreadsheet whenever I want, just by pressing the “Refresh All” button on the Data tab. I can even set the worksheet to auto-refresh every time I open it.
Here are the steps to get this working for you.
Create your filter
You may already have a filter set up. If you don’t, create a new one in Jira. If you don’t know how to create a filter, see this documentation. Make sure that you have identified the columns that you want to import into Excel. You can import all custom fields if you want. For most projects and reports, that is overkill. Instead, define the specific columns that you really need.
Test your filter
Before you start to integrate your filter into Excel, make sure that you are really getting the data that you need. Go to the Export button and download CSV (Current Fields). Then open it in Excel. Make sure that these are the right columns. If they aren’t, fix them in your filter and test until you are satisfied that you have everything that you need.
Create the Excel connection
Now that you have a filter that you have tested, it is time to create the connection between Excel and Jira.
Go back to the Export menu and right-click on the CSV (Current Fields) option
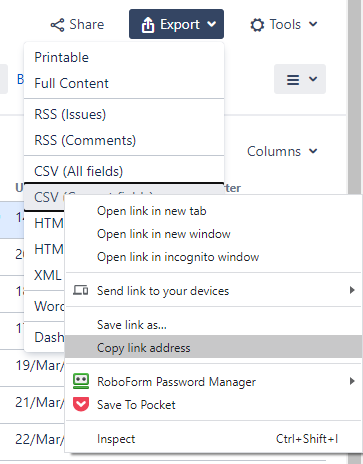
I am using Chrome. If you are using a different browser, your menu options will look different. Regardless, you want to Copy Link Address. When I do it in my test environment, I get
http://10.9.1.98:8080/sr/jira.issueviews:searchrequest-csv-current-fields/10500/SearchRequest-10500.csv
Your link will be similar but the base url and the filter id will be different.
Open a new Excel workbook, go to the Data tab and click on From Web.
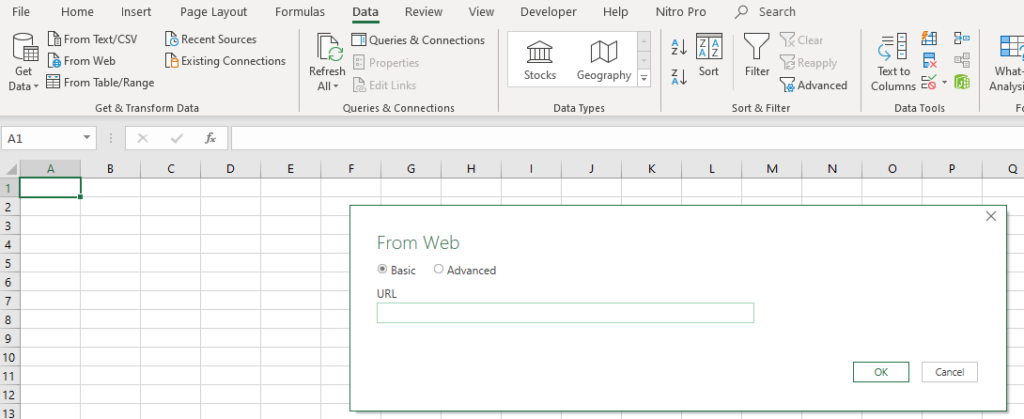
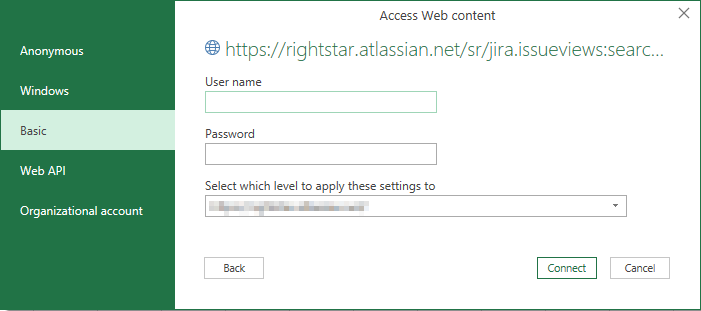
If you are on Jira Cloud, you will need to provide your username and password to access the filter. Use the Basic authentication:
If you are on Jira Server, you will need to click on the Advanced button to this dialog box
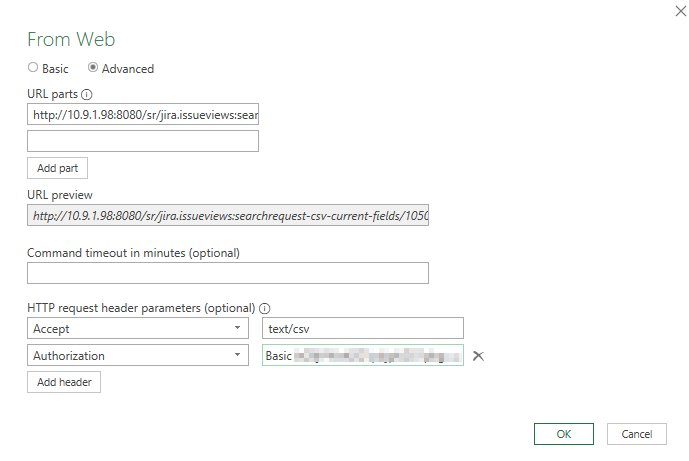
Paste the URL that you copied into the URL parts section at the top.
Then add two HTTP request headers:
Accept: text/csvAuthorization: Basic <base64 token>
Base64 token
Lets take a short digression to explain the base64 token. When you execute the URL, you need to pass in login credentials. This requires a special format, called a base64 token. You create this token by “base64 encoding” the string <username>:<password>. The “:” between username and password is required. For example, if your username is “janedoe” and your password is “doeadeer”, then the string you need to encode is “janedoe:doeadeer”
powershell "[convert]::ToBase64String([Text.Encoding]::UTF8.GetBytes(\"janedoe:doeadeer\"))"
This results in a string that looks like this: amFuZWRvZTpkb2VhZGVlcg==
Take that token that you generated and put it into the Authorization Header as “Basic <base64 token>” (see the above image).
When you click “Ok”, you will see something like this:
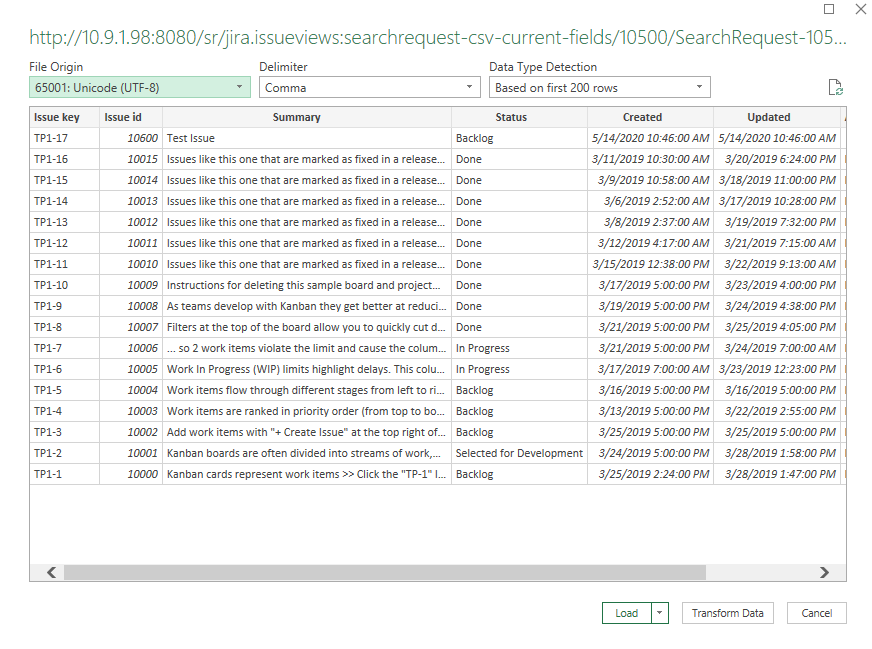
This is a partial download of your data. You can check to make sure that it looks correct.
Your last step is to click “Load”
Now you have the spreadsheet loaded
Refreshing
You can manually refresh this filters by clicking on “Refresh All” on the Data tab in Excel. You can also set your spreadsheet to reload the data whenever you open the spreadsheet. To do that, click on the down-arrow on the “Refresh All” menu. In the properties menu, click on “Refresh data when opening the file”
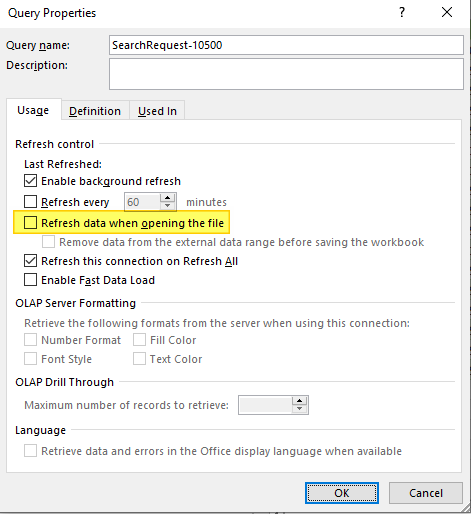 This will cause the connection to be refreshed automatically.
Now that you have the raw data, you can create Pivot Tables, Charts and other reports in Excel.
